
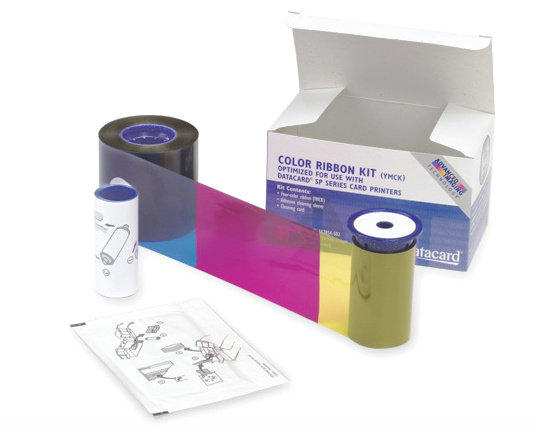
The Datacard 534000-003 YMCKT colour ribbon is a popular choice for those looking to create high-quality and long-lasting ID cards.
It is compatible with a range of Datacard ID card printers including the SD260, SD360 and SD460. Below, you’ll find instructions on how to change this ribbon on those machines.
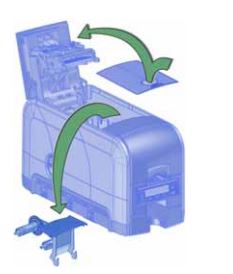
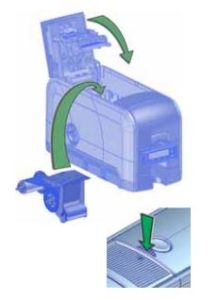
Step 1 – Open the top printer cover and remove the ribbon cartridge
Open the top printer cover and remove the ribbon cartridge as shown in the picture below.
Step 2 – Remove the old ribbon from the cartridge
Remove the old ribbon from the cartridge by pulling both rolls off the spools.
Step 3 – Load the new ribbon into the cartridge
Load a full roll of print ribbon (the blue spool) onto the blue spindle closest to the cartridge handle until it clicks into place.
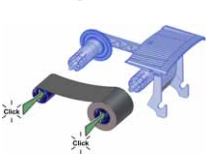
Place the silver take-up spool on the silver spindle with the black gear cog until it clicks into place. Now wind the take-up spool anti-clockwise one full turn.
Step 4 – Load the new cleaning sleeve
Remove the cleaning roller spindle with the used cleaning sleeve from the ribbon cartridge as shown in the picture below.
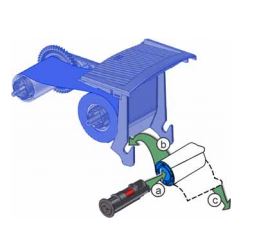
Remove the used cleaning sleeve from the spindle and replace it with the new one. Place the spindle back into the cartridge, ensuring you remove the cleaning sleeve protector.
Step 5 – Reinstall the ribbon cartridge
Now reinstall the ribbon cartridge into the printer by holding the handle and lowering it into the printer. The handle should be at the front end of the printer.
Make sure it is correctly positioned in its guides and then close the top printer cover. The process is now complete.
Need more help?
You shouldn’t run into any problems when changing a ribbon, but if you need more assistance you can contact our technical support team.